How to apply a tail pad
How to apply a Tail Pad to a surfboard or SUP
Tail pads serve two main purposes… they help to secure and lock your back foot in place, and when applied in the correct position, indicate where your back foot should be to get the maximum response from your board.
What is the Groove, Kick and Arch on a Tail Pad?
Tail pads generally come in 1-piece, 2-piece or 3-piece configurations, and there are many distinguishing features that set each one apart.
The Groove refers to the textured pattern in the EVA foam, the Kick is the raised ridge at the back of the pad, the Arch is a formed zone in the middle of the pad, and then there are other features such as perforations that can add another element of grip.

There’s no set rule for choosing a tail pad, its mainly personal preference, however it’s always a good idea to consider the width of your tail, and the tightness of the groove pattern. For this exercise we’re using a 3 piece pad…
Before applying a Tail Pad
Before applying any tail pad you first need to make sure the deck of the board is clean. If you’re replacing an old pad, remove any excess glue left behind with mineral turpentine, and then use an alcohol or spirit based solution to final prep the surface.
For new boards a simple wipe with a cloth or an alcohol based cleaner is sufficient.
How to align the tail pad on your board.
Using the stringer or centre-line is the best way to apply the pad symmetrically. For boards without stringers, use a ruler and pencil to locate and mark the middle of the board, and draw a line a little longer than the pad itself.

Next lay the pad on the board to get the layout right. Its best to align the middle of the pad between the side and centre fin, this is where you get the maximum amount of control and response from your board. Make a series of small location marks once it’s in the desired position.

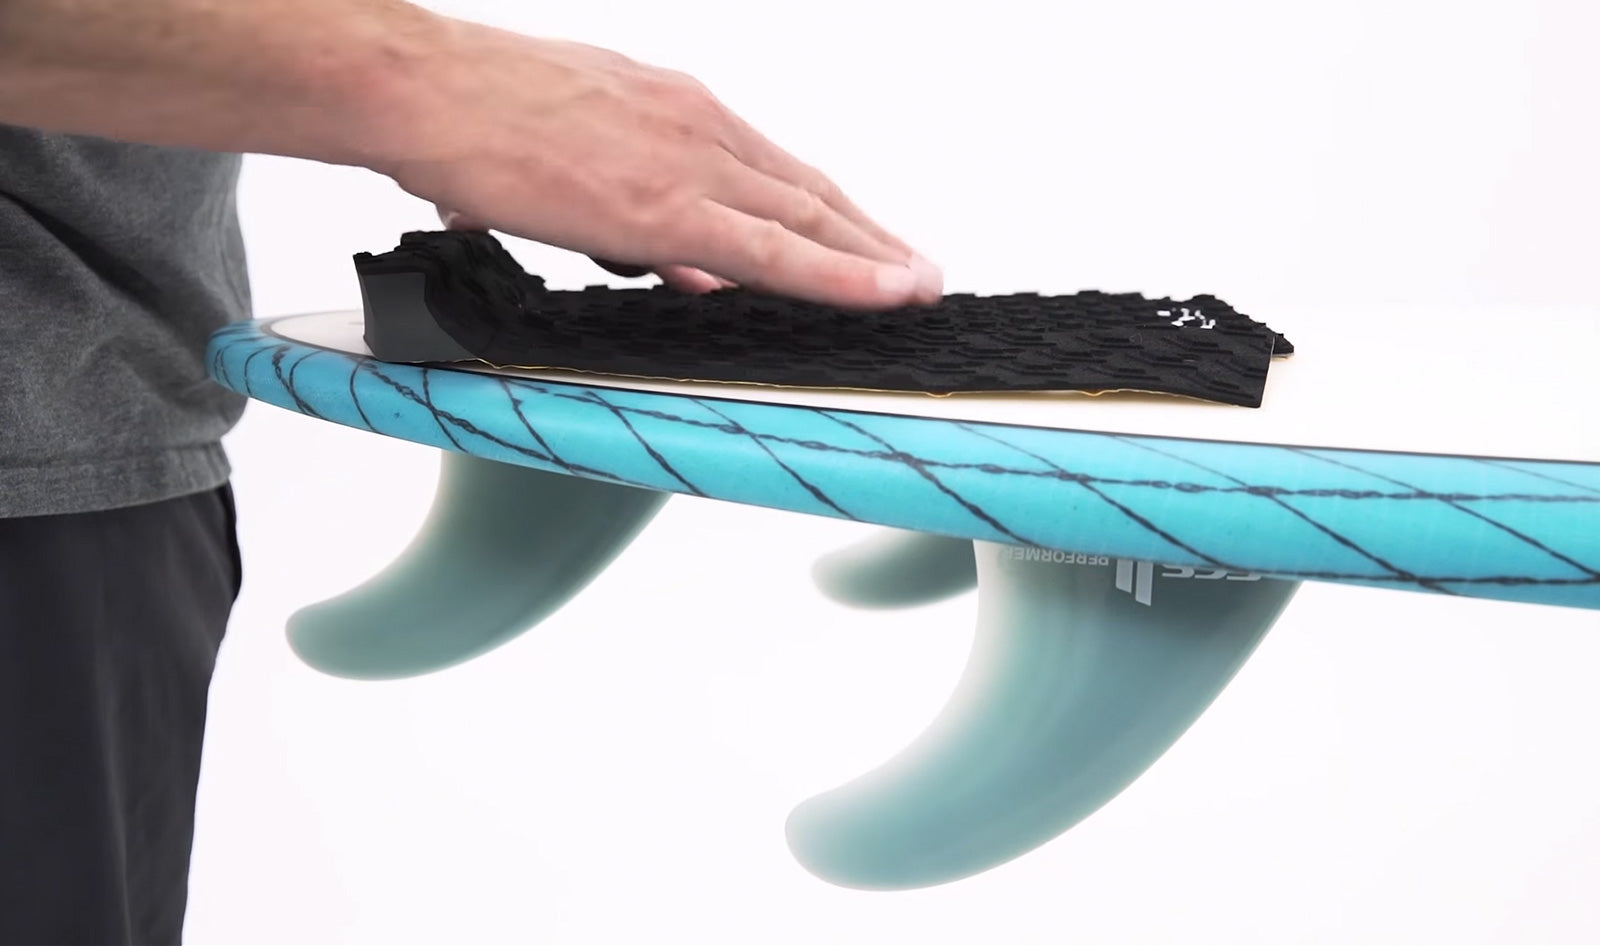
How to stick the tail pad to your surfboard.
Starting with the middle piece, peel off the adhesive paper, centre it on the line, and apply it to the board starting from the kick and then work forward. Apply downward pressure evenly to work out any bubbles, paying particular attention around the arch. Then apply the sides in the same way using your marks as a guide. Be sure the pieces are spread evenly apart, and enough so that your toes and heel remain on the pad when your foot is positioned in the centre.

Apply a little extra pressure around the edges, and that’s it your ready to go.
Pro Tip for extra traction.
As a final tip, if your pad starts to loose its grip, you can gently rub the surface with sandpaper to re-new the texture of the EVA, or many of the pro surfer’s choose to give the pad a light rub with wax.
